After hours of work i came to the conclusion that i was sticking with the advert for the vodka bottle. This is the final image.

Second year 3D Graphics
After hours of work i came to the conclusion that i was sticking with the advert for the vodka bottle. This is the final image.
As i was progressing through Houdini i started getting screen grabs of my progress. (not all grabs are in chronological order). 

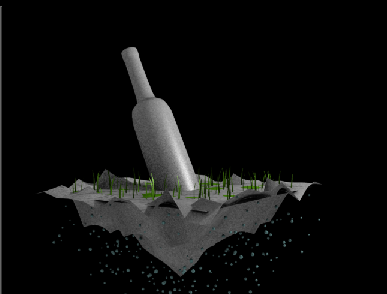


 Over all i was very happy with these test renders.
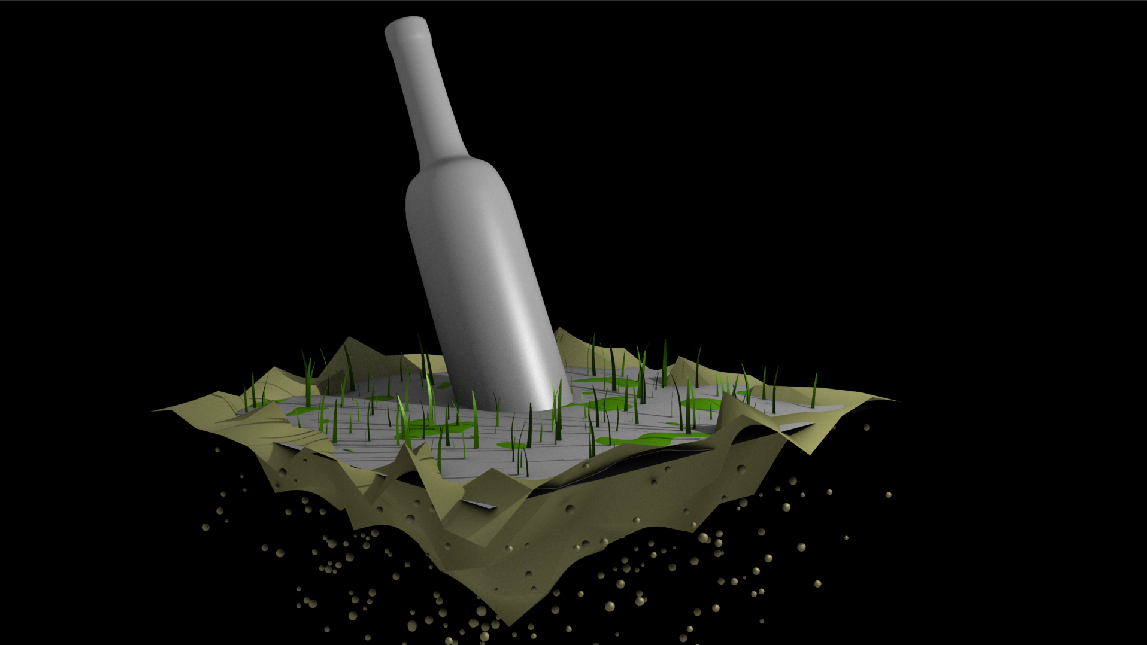
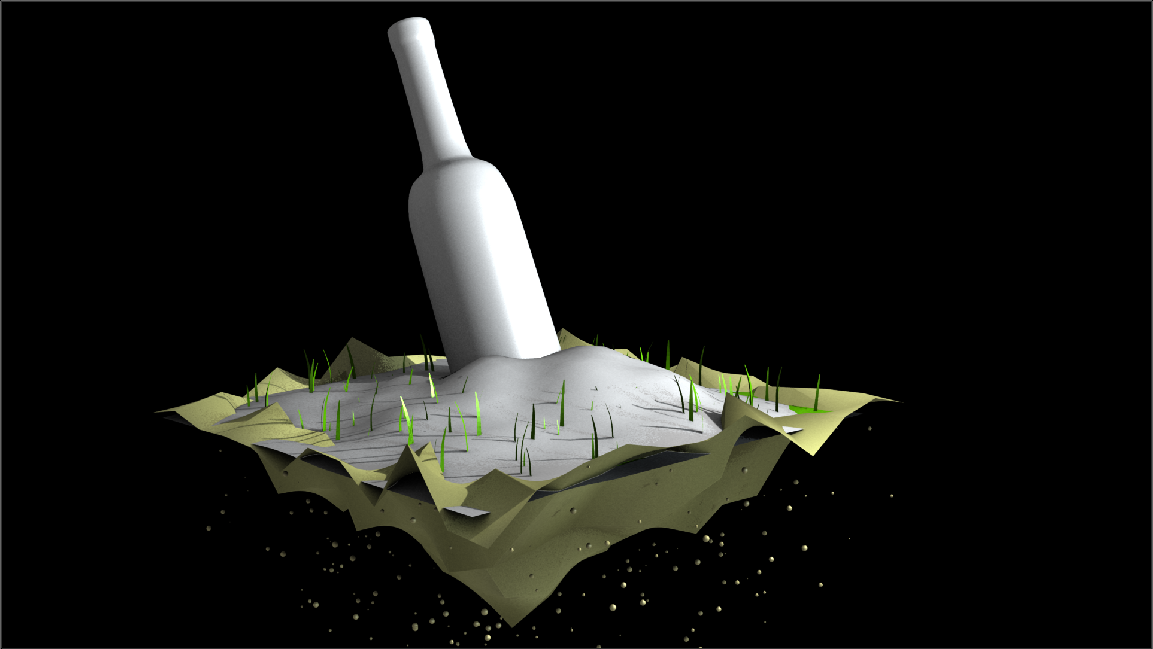
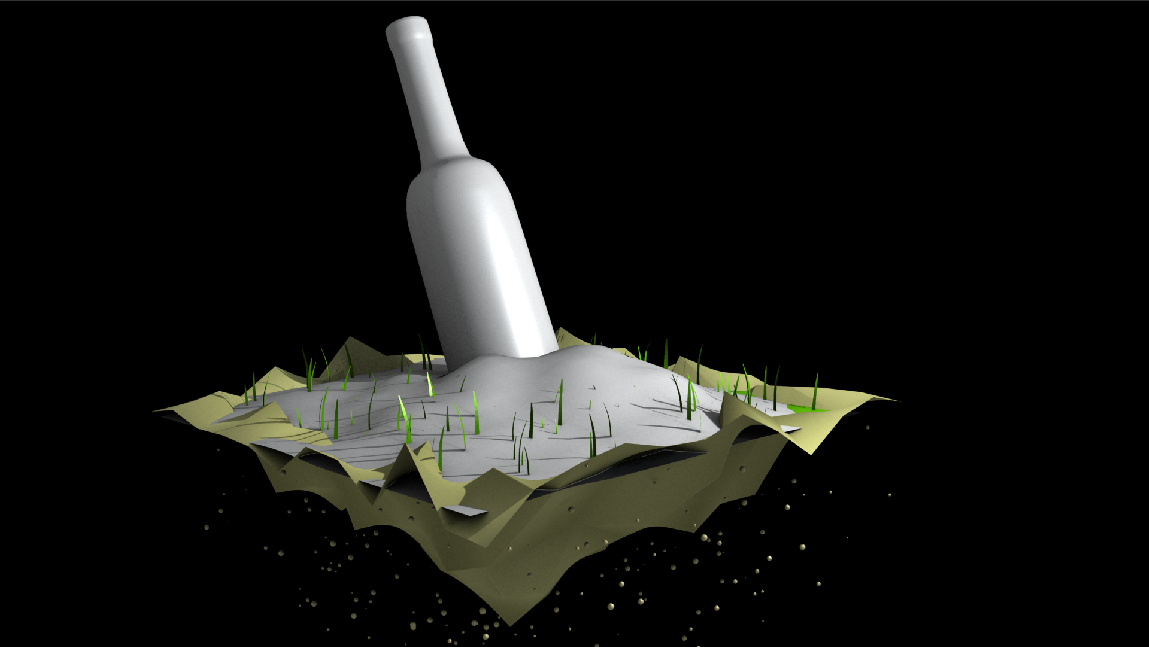
These are the high quality final renders that i have done using my HD camera view, with the mantra ROP.
My first is the bottel i exported with phantom objects and a forced matte so it just slips in to place when doing the 2D work.  My second was the ground and floor i used two shaders for this as i wanted two different textures this is probably what im most happy with. I had trouble with the texture tiling but after some playing around i got it to fit nicely.
 My third was the grass this was a bit of a night mare but i fortunately managed to get the grass in the proper places with a motion Sop.
 This was the vine that “ceeps” up the side of the bottel using the creep SOP.
 My Penultimate render of the trees went pretty well, allot of work went in to this Lsystem to make the trees semi life like. I used a poly wire for the bace of the trees and i used a facet to make sure i had points to work with.
 My final render is of the particles this was using a sphere and the copy sop and a random seed expression.
 Over all im very happy with these textured renders.
This example of groups in Houdini is normally used to create a simple landscape by selecting an area of points where you want to make a chane to a grid. You group them with the Group Geometry, and adding a Soft Transform to create raised and lowered parts.
This is a nice and quick way of creating things like sea, flat ground, mountains, lakes and extruding objects out but keeping a ‘stretched fabric’ form to them which can be useful in modelling. You can use a subdivide to get grater controle over certain areas this come in very handy. Growing and shrinking the selection of the points also came in good use for this task.

We also looked in to the Paint SOP briefly in lectures as pete transformed andres’s head, in this instance we used it to add basic colour information to the terrain this helps us distinguish what areas are what like green for level ground, blue for water, and brown and white for the mountain. This is useful for when you want a general outline of what is what without rendering, but the Paint SOP can used in an even more powerful way, as you can paint certain areas of something with a specific colour and that colour can provide information to something else in Houdini.
The Paint SOP is very effective as it can be used in much greater detail to comunicate with Houdini to make a certain areas react with different properties. Im sure ill be using the paint SOP in my project very soon.
Over the past few weeks i have learn’t allot about Houdini and the user interface. Keeping ontrack with remembering everything we do is quite tricky, this is why I will continuously look at tutorials and the online documentation for any problems that I incur during my journey through the creation of my final piece. Some of the terminology I had to make note of as they all begin to sound similar and it is good to have a reference as to not get confused by the different operators such as:
Some of these exercises will certainly come in useful as I look back at what I have done to help me construct my abstract landscape scene.
Some of my ideas for 3D lanscapes have been discussed through out my blogging, as i start to make my mind up i think about the pros and cons of each of my topic ideas. I need to make sure what im creating is not only achievable but conceptually strong. Some of the ideas I’ve looked into are just unachievable for me on my own, after looking into individuals work i’ve seen allot of simpler 3D with more complex matte painting and other more complex shading and texturing. Some of the ideas i have for my project are:
Topic Idea 1: Inside an object.
This is my first idea for the project its for me to have my landscape with in an object like a bottel or coffe cup like you’ve seen in my previous blogs. The idea came to me when researching other types of 3D landscapes and i saw the “coffee city” this was instantly a big favourite of mine for 3D landscapes as it was so simple yet clean and flawless. I was thinking of other things i could have my landscape with in and i thought about the bottom of a dirty glass or mug where the molde grows i could create a jungle like landscape. This was just one idea sparking of the concept of a landscape with in an object, this could be adapted in many ways.
Topic Idea 2: Landscape Background.
This idea was to have the landscape out of main shot like for example out of a window, this then ment that i could have the landscape out the window with someone standing in front of it. I think this would bring a different feel to the design of the landscape. For example i could have a silhouette in front of the window and in front of him i could have the landscape.
Topic Idea 3: Character In The Environment.
The third idea was to create a character and have him laying on his back and the landscape growing off him. This would then combine my passion for both character animation and the set brief for landscape. The idea would be interesting for me to try and complete unfortunately i feel this task could be a very time consuming one. I will keep furthering my ideas until i get a final result that both me and pete are happy with.
These are just three topic ideas for the 3D project that i will have completed by january. Hopefully all will go well as i continue to experiment within Houdini.
I have found a totaly incredible website for 3D work called http://www.arsthanea.com/work/ There work is next to none. I have seen there 3D picture for the discovery channel and it was insane this picture was probably one of my favorite image manipulations ever. Now im learning 3D the 3D elements could be created with allot of time and effort on the software. The things i like about this photo are the cleanness of the images and the way it has been composited. This project was all done by arsthanea a very create design agency, this image is a serious contender for my project idea.
 After looking at this peice for a while i then found a making of video witch really showed the effort that when into this piece of work. This is the awe inspiring video made by arsthanea:
This website will be where allot of mt research will take place as i think there incredible.
After reading through the brief and having a look at some 3D landscapes i looked into some matte painting becasue i feel this is what sells the 3D the painting done in photoshop really does bring out the style of the landscape. After researching about matte painting i found this book called d’artiste: Matte Painting. (http://www.ballisticpublishing.com/books/dartiste/matte_painting/). This book was written by some incredible matte painters who have done the likes of “lord of the rings”. Some ideas i had for 3D was to create a landscape of a characters body im not sure how achievable this is as im a total novice at Houdini.
These are some of the ideas i had:
 This one i liked allot because it had great texturing and a real surreal feel, after looking at this peice a while i went out and started looking where it was from. I found out that this piece was created by the studio ArsThanea they combined a 3D render with a 2D design to create a stunning visual and landscape. When thinking about design and where i want to go with my assignment ill keep in my head that i want to combine 3D and 2D effectively to create a visually stunning piece.
This next one was one of my favorite pieces of simplistic 3D i’ve ever seen. I thought the concept was great and the finished result even better, this simple yet very effective design really did show me what could be achieved with just rectangles. The shading i think is one thing that really makes this piece pop, the render is lit incredibly well also. I need to think hard about what rout im going to go down for my design, all i know for now is not to go to over the top.
 After looking at the two designs above i started to narrow my search about what i want to do for my landscape piece. I now knew that i was going to incorporate some sort of 2D objects along with a simple yet effective design like the coffe city above. When looking at, in my opinion, good 3D designs they didn’t have a landscape strait on unless they were very talented, they had the landscape through a window or bottle or something simular. I liked the idea that the design wasn’t an in your face design however it was still very aesthetically pleasing. I think the 3D piece will be not only a test of Houdini knowledge but a test of photoshop also. I kept on looking at other designs and it lead me to this next one. This next one is using the idea i explained earlier with the landscape looking through a window. This design is very interesting because it has an interior and exterior landscape, i feel i could explore this idea further.
 This design was different to the other two and im guessing much more expensive to render. This idea was a nice idea because it had two landscapes like i said earlier. Im going to continue to look in to other 3D designs and hopefully create a good landscape concept.
After learning the basics of Houdini I started experimenting with it and looked for a tutorial i found a tutorial of a fighter jet this was a simple and good starting point for me. By making making simple objects which were slightly different to the cylindrical objects I had been using for lighting and camera basics.
Now starting off i put down my geo node then deleted the file sop and starting out with a box, after dividing it into three sections I then began extruding parts of it until i felt i had created a shape that was easily editable in to my fighter jet. I began to go into more depth and add details by transforming and moving certain points and edges. After watching the tutorial i then learnt about mirroring this was where you took one half of you model and morred it so it was semiotical on the other side. After the mirroring i used some sub divides to a few parts to round the edges this was the end of the fighter jet and i think it had gone pretty well.

Probably one of the biggest problems which I had while modeling was to mirror and connect one half of an object so it connects properly without looking like it’s divided “im always getting a centre line”.I got allot of my techniques after learing about NURBS in one of our lectures i took what i learnt from the lecture about the tea pot and modelling to create this fighter jet. The modelling was pretty tricky as it wasn’t quite as fluent as maya, however i can see procedural modelling with in Houdini being a hell of allot easier in the long run.
We have just started 3D and it looks insanely hard, after using maya for modelling and the occasional bit of 3D Studio max i thought id undertand the interface but after looking at it for 4 hours i was none the wiser. This was like staring from scratch, i always like a challenge and after pete going though some of the interface of Houdini i thought i might be able to pick it up with in a few weeks and run with it. However this wasn’t the case i knew that it would be hard but this was unreal, after the first couple of lectures i then went off at home and did research into different areas of Houdini this was going ok however the terminology through me a bit. After looking though a few tutorials i wasn’t sure how i could create a scene with in Houdini colour and texture the lot. So i kept looking and found out that within 3D you normally only do it one piece at a time this then became clearer to me.
We have now looked though the interface a bit and been shown the network side of Houdini where most of the work flow goes on, the only way i can think of describing it is like layers in photoshop that need to be connected. After going though Houdini i then started thinking about the brief, the brief was to create a landscape using some of the 3D tools we have been shown. I thought we were going to look at the more animated side of Houdini when i started, not disheartened i carried on learning parts of Houdini. Ever since taking the course of 3D i really wanted to create my own 3D character unfortunately restricted by the brief i started thinking of ways i could add my character into the scene one of my ideas was to have him lying down and the lanscape would be his body with grass and other elements coming off him.
As the lectures go on ill dive into more depth about what ill be creating and how. This is a very exciting project for me and a real test i can only hope that if i put enough work in the end result will come through.
